Gaming Services is a system app that handles the installation and update of games obtained through the Xbox app. It supports Xbox Live features such as multiplayer gaming and achievements. However, if the Gaming Services app doesn’t install or update on your Windows 10 or 11 PC, you cannot do any of these things until you fix the issue.

When Gaming Services fails to update, the Xbox app may become stuck on ‘Installing gaming services. This may take a few minutes’ message. This prevents you from downloading or updating games and playing your existing games, as Windows consistently redirects you to the Microsoft Store. This guide contains some useful tips that will help solve the problem.
1. Close the Xbox App and Try Again
Since the Gaming Services app is tightly integrated with the Xbox app, you may have trouble installing or updating it while the Xbox app is active in the background. Start by closing the Xbox app on your PC and see if you can update Gaming Services.
Click the ‘Show hidden icons’ arrow on the taskbar, right-click on the Xbox icon, and select Quit.

Open the Microsoft Store app, switch to the Library tab from the left sidebar, and then click the Update button next to Gaming Services.

2. Run the Windows Store Apps Troubleshooter
Running the Windows Store Apps troubleshooter effectively tackles app installation or update issues on your PC. You can try running this tool and see if that gets Gaming Services to update.
Step 1: Press the Windows + I keyboard shortcut to open the Settings app. Choose the System tab from the left sidebar, click on Troubleshoot from the right pane.
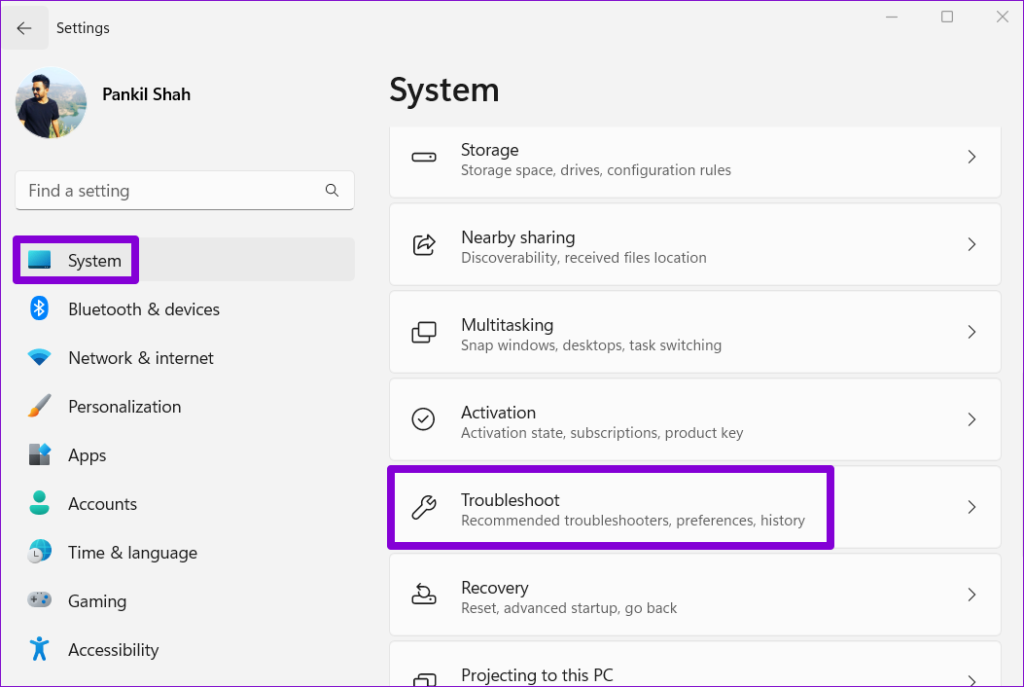
Step 2: Click on Other troubleshooters.

Step 3: Click the Run button next to Windows Store Apps to initiate the troubleshooting process.

Allow the troubleshooter to run, and then try to update Gaming Services one more time.
3. Repair or Reset the Gaming Services App
The Gaming Services update may become stuck on installing if the existing data associated with the app has become corrupted. You can try fixing the problem using the built-in app repair feature in Windows. Here’s how.
Step 1: Right-click on the Start icon and select Installed apps from the list.

Step 2: Scroll through the list to locate Gaming Services. Click the three horizontal dots menu icon next to it and select Advanced Options.

Step 3: Click the Repair button and allow Windows to fix any issues with the app.

If Gaming Services won’t install or update even after you repair it, try resetting it from the same menu. This will erase all data associated with the app, including corrupted files, and restore it to its default settings.

4. Reset the Microsoft Store Cache
Such issues while updating apps could also arise due to a corrupted Microsoft Store cache. If that’s the case, resetting the Microsoft Store cache should fix the problem.
Step 1: Press the Windows + R keyboard shortcut to open the Run dialog box.
Step 2: Type wsreset.exe in the Open field and press Enter.
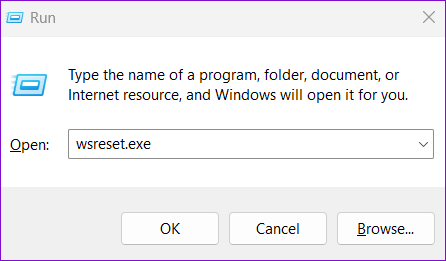
Microsoft Store will open automatically after purging the cache. Following that, you should be able to update Gaming Services on your Windows 10 or Windows 11 PC.
5. Delete the Gaming Services Keys From the Registry
Improperly configured Gaming Services entries in registry files can also cause such issues. Some users on the Microsoft forums reported fixing the issue by deleting the Gaming Services key using the Registry Editor. You can also give this method a shot.
Since registry files carry important settings for Windows, it’s a good idea to back up all the registry files or create a restore point before proceeding.
Step 1: Press the Windows + S keyboard shortcut to open the search menu. Type registry editor in the box and select Run as administrator.

Step 2: Select Yes when the User Account Control (UAC) prompt appears.

Step 3: In the Registry Editor window, use the address bar at the top to navigate to the following key:
Computer\HKEY_LOCAL_MACHINE\SYSTEM\CurrentControlSet\Services\GamingServices

Step 4: Right-click on the GamingServices key in the left pane and select Delete.

Step 5: Select Yes to confirm.

Step 6: Similarly, delete the GamingServicesNet key as well.

Restart your PC after completing the above steps to check if you can update Gaming Services after that.
6. Uninstall and Reinstall Gaming Services
If deleting Gaming Services keys from the registry proves ineffective, you can use PowerShell to remove and reinstall Gaming Services on your PC. Here’s how to do it.
Step 1: Click the search icon on the taskbar, type in powershell, and select Run as Administrator.
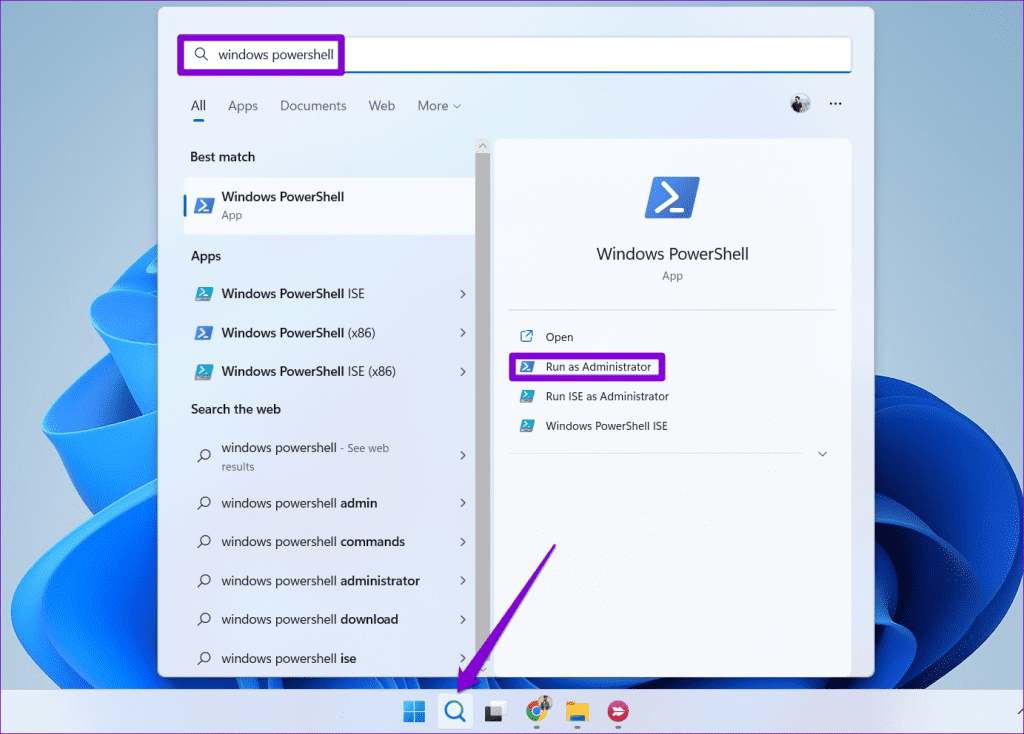
Step 2: Select Yes when the User Account Control (UAC) prompt appears.

Step 3: In the PowerShell window, type the following command and press Enter.
get-appxpackage Microsoft.GamingServices | remove-AppxPackage -allusers

Step 4: Once PowerShell removes Gaming Services, type the following command and press Enter:
start ms-windows-store://pdp/?productid=9MWPM2CQNLHN

Step 5: Click the Install button to download the app.

Reboot your computer after that, and the Xbox app should no longer ask you to install or update Gaming Services.
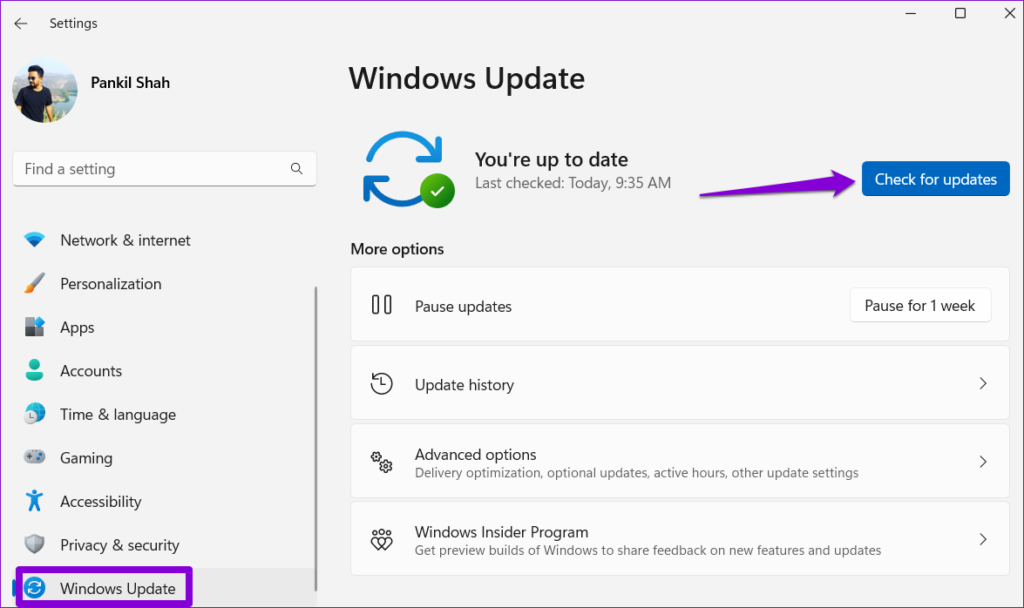
7. Install Windows Updates
If you still can’t install or update Gaming Services, there may be an issue with Windows. You can install pending Windows Updates to see if that solves the problem.
Press the Windows + I keyboard shortcut to open the Settings app. In the Windows Update tab, click the Check for updates button. Download and install pending system updates and then try to update Gaming Services again.
Gaming Thrills Await
One of the above suggestions will fix the Gaming Services not installing or updating issue on your Windows 10 or 11 PC, allowing you to continue gaming without any disruptions. After that, remember to try out these useful tips to improve the gaming performance of your Windows PC.
Last updated on 07 August, 2023
The above article may contain affiliate links which help support Guiding Tech. However, it does not affect our editorial integrity. The content remains unbiased and authentic.
Read Next
 Top 5 Ways to Fix Location Services Grayed Out on Windows 11
A bunch of apps on your Windows 11 computer rely on the location services to determine your location.
Top 5 Ways to Fix Location Services Grayed Out on Windows 11
A bunch of apps on your Windows 11 computer rely on the location services to determine your location.
 Top 6 Ways to Fix Services Not Opening on Windows 11
Windows Services is a system app that allows you to enable, disable, and configure various services installed on your computer.
Top 6 Ways to Fix Services Not Opening on Windows 11
Windows Services is a system app that allows you to enable, disable, and configure various services installed on your computer.
 How to Fix Google Play Services Won’t Update Issue
Life is going well until our smartphone starts acting up.
How to Fix Google Play Services Won’t Update Issue
Life is going well until our smartphone starts acting up.
 How to Manually Update Google Play Services
I know you are frustrated because apps on your Android phone have kind of stopped working.
How to Manually Update Google Play Services
I know you are frustrated because apps on your Android phone have kind of stopped working.
 Top 3 Ways to Delete Old Windows Update Files From Windows 10 and Windows 11
Windows updates bring new features, security improvements, and bug fixes for your PC.
Top 3 Ways to Delete Old Windows Update Files From Windows 10 and Windows 11
Windows updates bring new features, security improvements, and bug fixes for your PC.
 Top 7 Ways to Fix Google Play Services Draining Battery on Android
Android offers a dedicated Battery menu to check all the apps and services affecting the battery life on the phone.
Top 7 Ways to Fix Google Play Services Draining Battery on Android
Android offers a dedicated Battery menu to check all the apps and services affecting the battery life on the phone.
 Top 8 Ways to Fix Location Services Not Working on iPhone
Several apps on your iPhone rely on your location data to fetch relevant content like nearby places or navigating via Google Maps.
Top 8 Ways to Fix Location Services Not Working on iPhone
Several apps on your iPhone rely on your location data to fetch relevant content like nearby places or navigating via Google Maps.
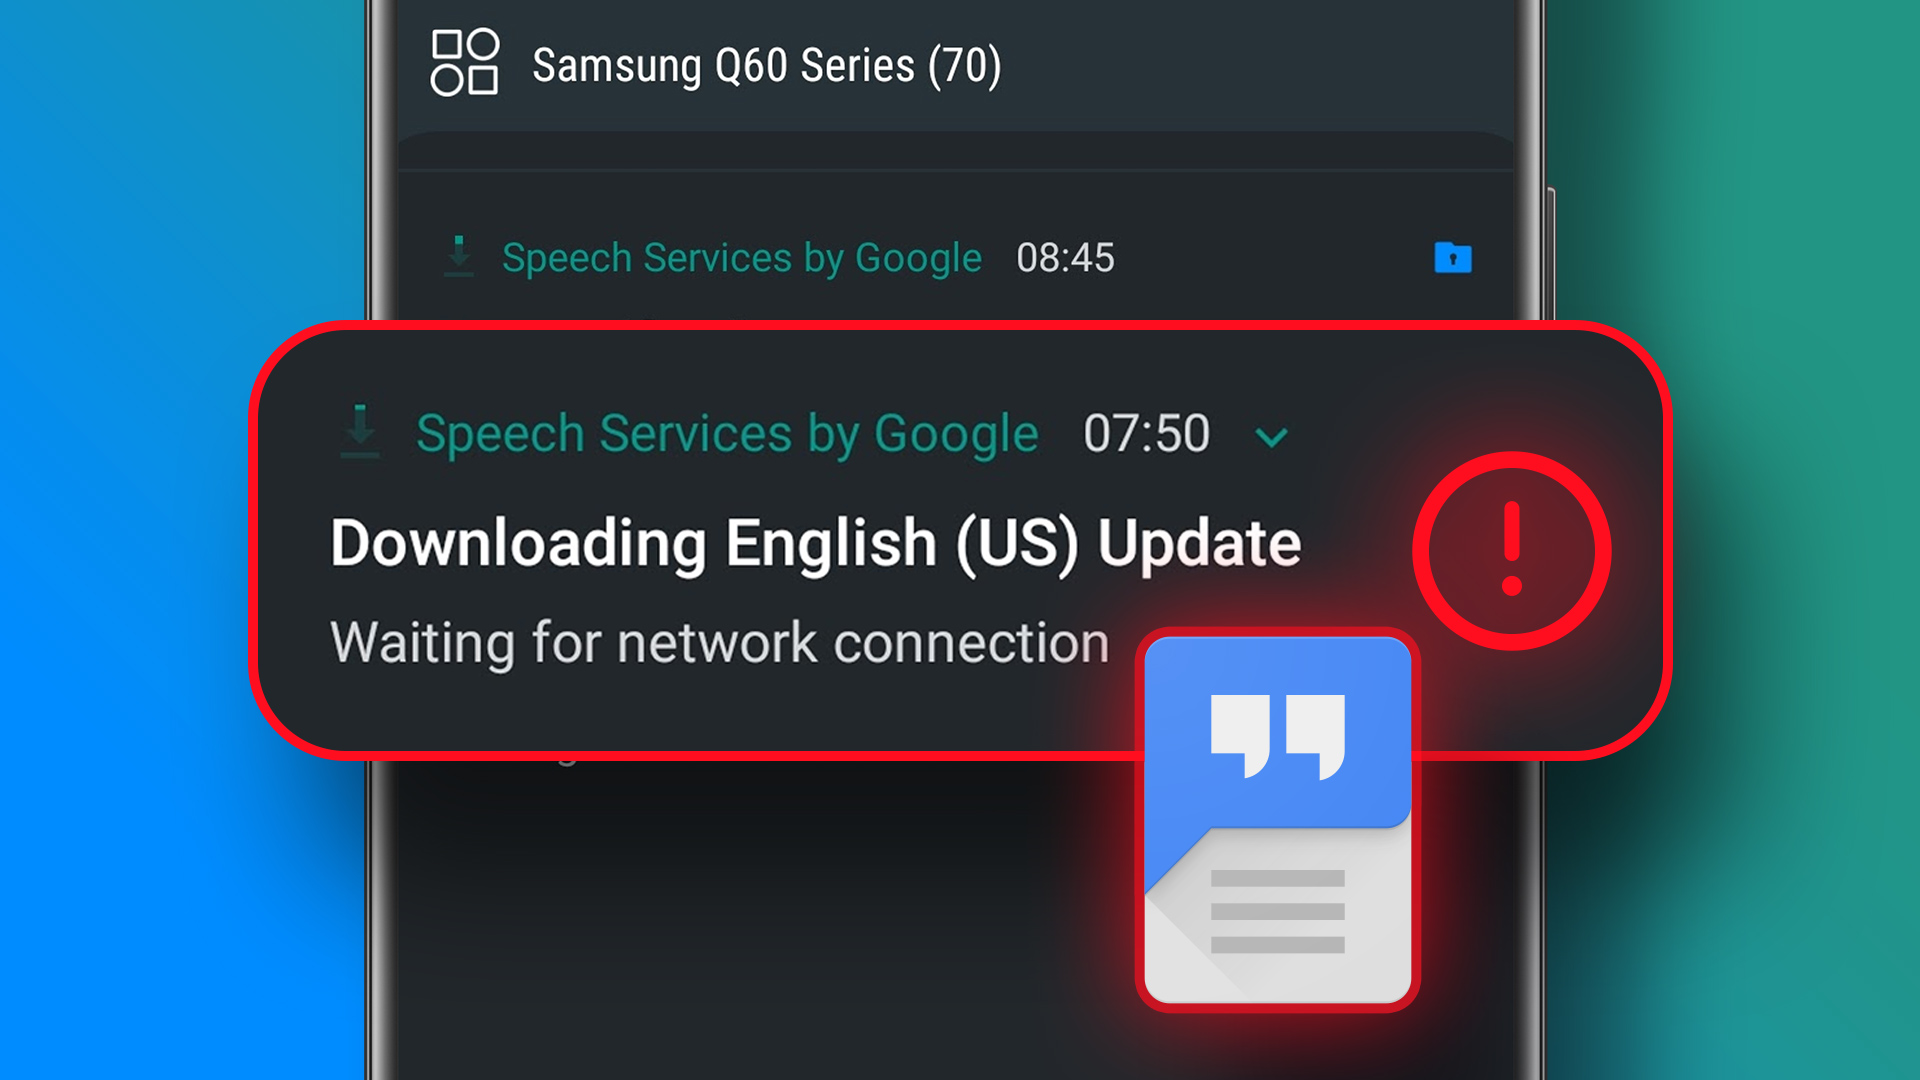 Top 6 Ways to Fix Speech Services by Google Download Stuck on Android
Speech Services is an essential system app that empowers your Android phone with Google’s text-to-speech and speech-to-text functionality.
Top 6 Ways to Fix Speech Services by Google Download Stuck on Android
Speech Services is an essential system app that empowers your Android phone with Google’s text-to-speech and speech-to-text functionality.
DID YOU KNOW
Up until September 14, 1995 domain registration was free.