One of the selling points of Windows is that it lets you install several applications within a few clicks. However, there may be times when you need to uninstall those applications from your computer. It may be because you want to create some extra space or remove an application you no longer use.
It’s easy to uninstall applications on Windows 11 and there are multiple ways to do it. So, let’s check out five quick ways to uninstall programs on Windows 11.
1. Uninstall Programs Using the Settings App
The Settings app is the go-to place to control your Windows operating system better. Whether you want to create a new user account, manage networks or personalize your computer, you can do it all using the Settings app.
You can also use it to uninstall applications from your computer. Here’s how:
Step 1: Press Windows + I keys to open the Settings app.
Step 2: In the Settings app, choose Apps from the left sidebar.
Step 3: Select Installed apps from the right pane.
Step 4: Click on the three horizontal dots icon next to the app you want to uninstall and choose Uninstall from the context menu.
Next, follow the on-screen instructions to complete the uninstallation process.
2. Uninstall Programs Using the Start Menu
The Start Menu allows you to quickly access third-party as well as UWP (Universal Windows Platform) apps installed on your computer. It’s also one of the places to uninstall applications from a Windows computer.
Here’s how to use the Start Menu to uninstall a program:
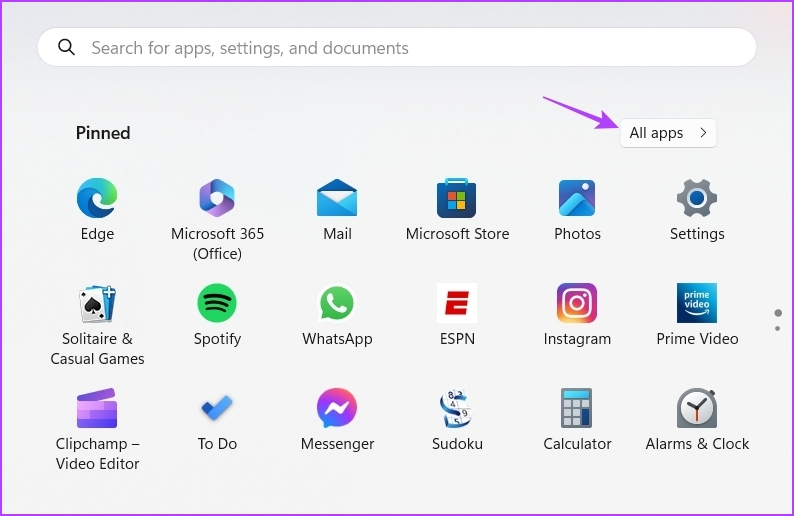
Step 1: Press the Windows key to open the Start Menu.
Step 2: In the Start Menu, click the All apps option at the top right corner.
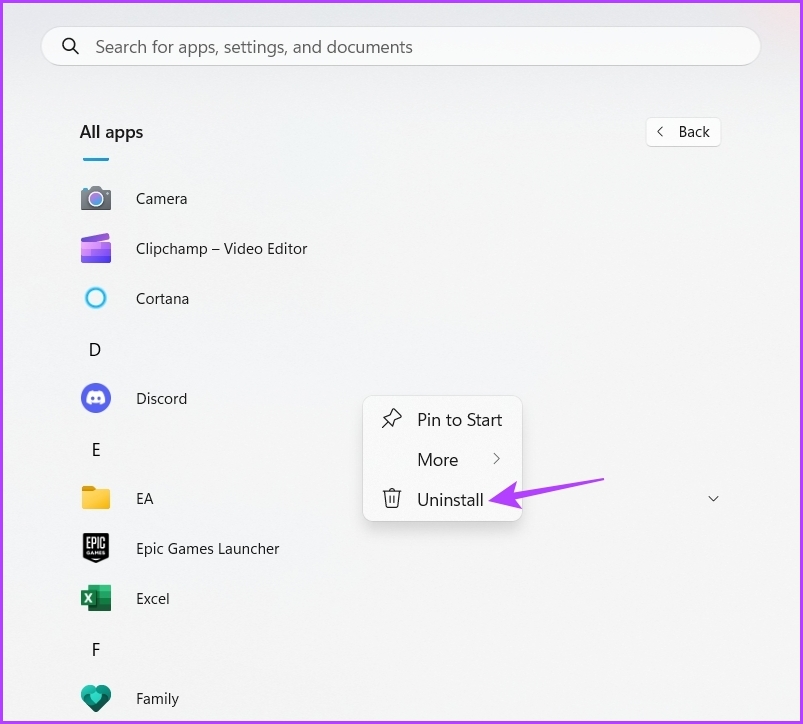
Step 3: Locate and right-click on the program you want to uninstall. Then, choose Uninstall from the context menu.
3. Uninstall Programs Using the File Explorer
File Explorer is usually used to access files and folders stored on your computer. But it can also come in handy in uninstalling programs, provided they have uninstall.exe in their installation folder.
Here are the steps you need to follow to uninstall a program using File Explorer:
Step 1: Open the Start Menu, type the name of the program you want to uninstall in the search bar, and choose Open file location from the right pane.
Step 2: In the folder that opens, right-click on the program icon and select ‘Open file location’ one final time.
Step 3: Locate uninstall execution file, right-click on it and select Open to initiate the uninstallation process.
4. Uninstall Programs Using the Control Panel
Control Panel, as the name suggests, allows you to better control your Windows operating system. Although you can use it to configure hardware settings, customize date and time, change system appearance, and much more, but it is mainly known as the go-to place to uninstall programs from Windows.
You can uninstall programs using Control Panel by following the instructions:
Step 1: Open the Start Menu, type Control Panel in the search bar, and choose Open from the right pane.
Step 2: In the Control Panel, choose Category in the View by option.
Step 3: Click on Uninstall a program.
Step 4: Right-click on the app you want to uninstall and choose Uninstall from the menu that crops up.
Note that you can use the Control Panel only to uninstall third-party applications. To uninstall UWP apps like the Calculator, you can use either of the above methods.
5. Uninstall Programs Using Command-Line Tools
If you’re a power user, you can use command-line tools like Command Prompt or Windows PowerShell to uninstall applications from your computer. Here’s how to do that using Command Prompt:
Step 1: Open the Start Menu, type Command Prompt in the search bar, and choose Run as administrator from the right pane.
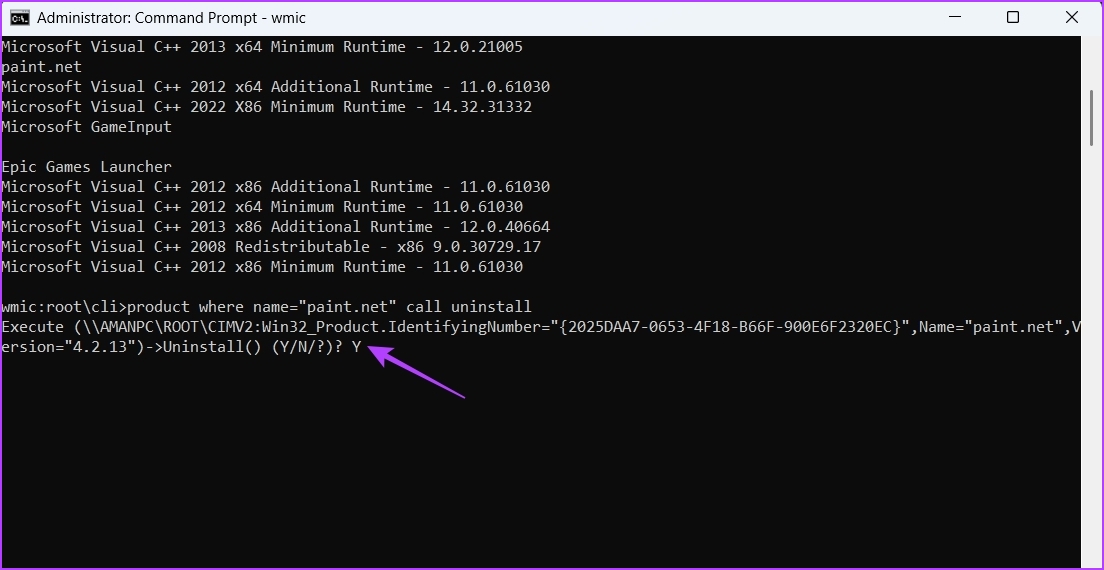
Step 2: In the Command Prompt window, type wmic and press Enter.
Step 3: Type the following command and press Enter. It’ll display all the apps installed on your computer.
product get name
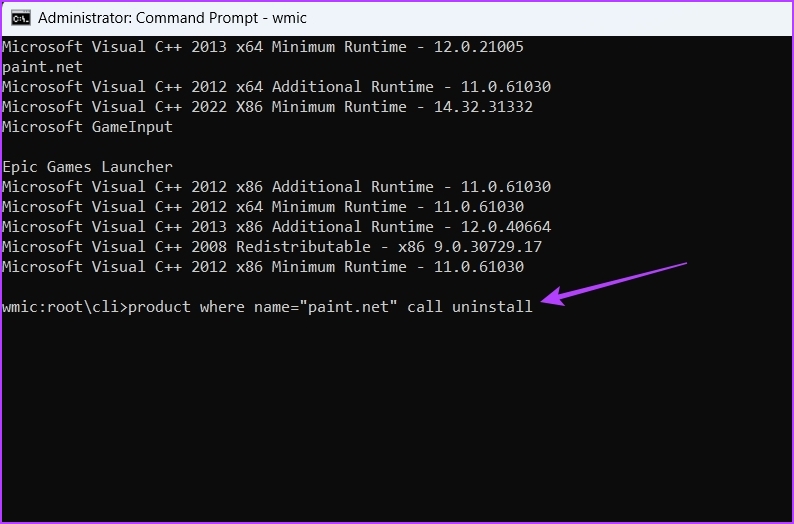
Step 4: To uninstall an app, type the following command and press Enter. Make sure to replace “app name” with the name of the app you want to uninstall.
product where name="app name" call uninstall
Step 5: Type Y and press Enter to confirm your selection.
Now, to uninstall a program using Windows PowerShell, follow the below instructions:
Step 1: Open the Start Menu, type Windows PowerShell in the search bar, and select Run as administrator from the right pane.
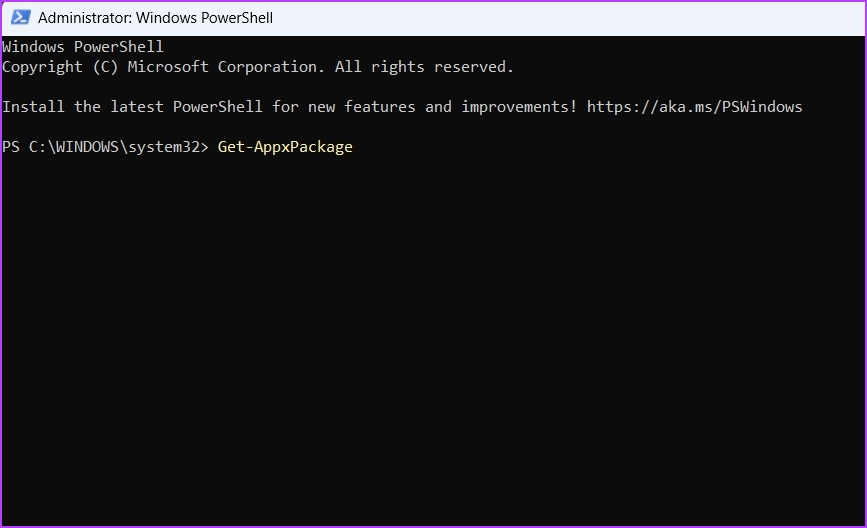
Step 2: Type the following command in the PowerShell window. It’ll display all the installed applications.
Get-AppxPackage
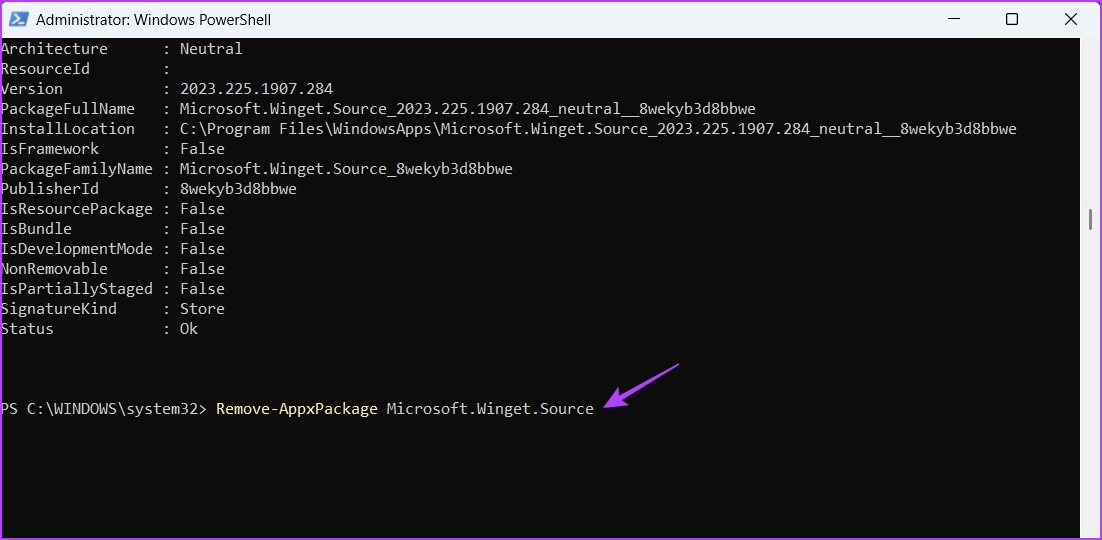
Step 3: Locate and note down the full name of the app you want to uninstall. Then, type the following command and press Enter. Make sure to replace ‘app name’ in the command with the full name of the app you want to uninstall.
Remove-AppxPackage <app name>
Keep Your Computer Clean
Unnecessary applications take up a lot of space and slow down your computer. To tackle this situation, uninstall all such applications from your computer. You can uninstall them using the above methods.
Last updated on 28 February, 2023
The above article may contain affiliate links which help support Guiding Tech. However, it does not affect our editorial integrity. The content remains unbiased and authentic.

